Coding Evening

Last Thursday, I had the privilege of attending and briefly speaking at a Coding Evening at the Mozilla HQ in London. The event was run by my fellow ADE Cat Lamin, who started these events a year or so ago to provide an informal and relaxed atmosphere to learn about how to teach ‘coding’ in primary school and to try out different kit. The new ‘Computing‘ curriculum in the UK is ambitious and probably a really good idea, but I think it does terrify a lot of teachers and I’m not sure all teachers are suitably trained or equipped to deliver it. Hence providing a space for teachers to learn a bit more!

The evening run regularly in Peterborough and Twickenham, but the central London one was a one-off special event, complete with free drinks and pizza thanks to sponsors! It was pretty cool to hang out in what was basically the Mozilla staff room (they have what is quite possibly the largest TV screen I have ever seen), but it was also great to meet new people and learn new things.

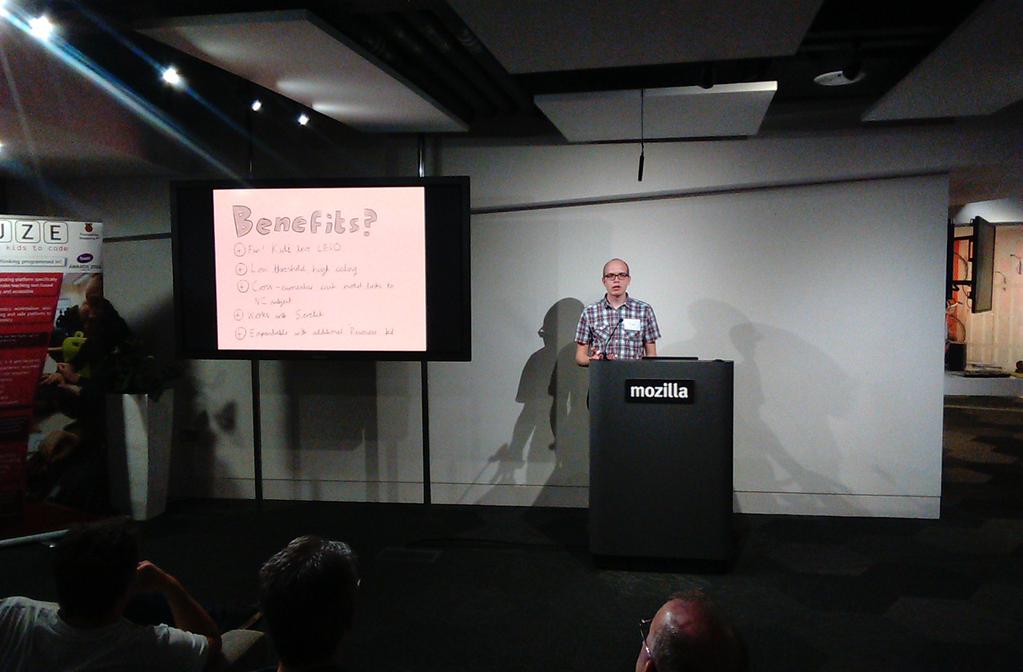
As part of the evening, there was a string of ‘lightning talks’ from different people about how they’ve done interesting and cool stuff with coding in schools. I got the chance to share briefly about how we use LEGO WeDo, which I think went down well.  There was also different companies representing their wares, which was interesting:

  • A guy called Marc Grossman was there, demoing Scratch, Kodu and Code Club. Scratch is a great visual programming tool designed by MIT, and Kodu is a cool 3D game designer from Microsoft.  But what really impressed me was the resources he shared from Code Club.  Code Club is a not-for-profit organisation that gets volunteers to run coding clubs in primary schools. What is really handy is that you can download the worksheets etc. that they use and deliver it yourself. I shall be making use of that!
  • A plucky upstart company called Pi-Top were demoing their product, which was essentially a green laptop that runs off a Raspberry Pi. It did seem pretty cool, and reminded me of my childhood days playing with a ZX Spectrum and figuring out how to make things work.
  • There was also a company called FUZE there, who make a computer for schools that is basically a robust keyboard case that houses a Raspberry Pi.  What is unique about them is that they include their own version of BASIC for children to use, claiming that introducing more complex languages like Python to children just puts them off coding, rather than hooking them in. This was an interesting challenge to me, as we have included Python in our Computing curriculum at school, which admittedly is hard for teachers and children to get their heads around. I’m not sure I’d want to introduce a set of computers that would need to be plugged in and set up each week just to teach Computing lessons once a week.

It was a really excellent evening and I would recommend it to anyone who wants to get their head around how to teach Computing in school.

Introducing Showbie

We’ve started using Showbie in my school.  Which feels a bit like saying, “Hey, guys, did you know that they’ve invented colour TV?” Or, “I finally had a ride on one of those new-fangled horseless carriages…wasn’t so bad.”

I’m not sure when Showbie was first launched, but it’s definitely been vaguely on my radar as a paperless classroom solution for iPad ever since the magical tablet first appeared in 2010. Since then it’s become a de-facto app solution for managing digital workflows in iPad schools, even appearing as number 4 in a Top 10 list of apps as votes by ADEs in the Summer. However, I’ve always dismissed it as being useful in a Primary school that wasn’t 1:1 with iPads, so haven’t given it much consideration up until now.

However, last year a brilliant Apple Distinguished Educator Julian Coultas came to visit our school to suggest ways that we could take our iPad journey further, and he mentioned about Showbie. We were increasingly hitting the problem of how to evidence, record and generally deal with the digital content that was being made in lessons using iPad. Lots of interesting learning was happening in classrooms using technology, but it was often hard to tell this looking in children’s books.  Some teachers were willing to go through the laborious process of printing off children’s work and then sticking it in books, but most were not: why make a lively, engaging iPad lesson into a laborious bureaucratic chore? Plus, how exactly does one go about printing a video?

Instead, Showbie offers a solution to three interrelated but distinct problems:

  1. Digital portfolio – keeping a record of children’s learning. With Showbie, each pupil has their own account where iPad learning can be handed into. This then creates a record of the learning process on iPad, complete with comments and dialogue between the child and the teacher.  And with the latest version of Showbie, there is even the ability to create ‘proper’ student portfolios!
  2. Managing ongoing projects with shared iPads. Once work-in-progress has been saved to Showbie, a child can then log into Showbie on any iPad, re-download it and then continue.  With shared iPads across year groups, then avoids the issue of children having to remember the iPad they used the lesson before.
  3. Distributing resources/documents. Showbie makes it easy for teachers to distribute documents/images/instructions to children for a given lesson.  We’ve already got a generic email account setup for each class set of iPads which currently offers a lo-fi version of this – teachers can email images and web links to a set of iPads – but Showbie adds more power and flexibility.

We launched all this a week or so ago, complete with some class demos and a staff meeting from Julian, which unfortunately coincided with a horrendous Showbie outage. Despite being entirely unable to even log into Showbie to show them, teachers seemed really up for the solution Showbie offered to the problem of a student e-portfolio/continuing work on a shared iPad/distributing content.

Since then I have been working my way around classes to give brief Showbie demos so that both children and teachers feel confident in the workflow (which, after enrolling into a class, is basically: log into Showbie, do you work, ‘Open In’ Showbie and hand work in at the end of the lesson, and then log out of Showbie).

In order to make the creation of student accounts manageable in a large school, we’ve gone for the paid ‘Pro School’ account. The guys at Showbie have been incredibly helpful and supportive and have ironed out any issues we’ve run into.

Appreciating Apple TV

At our school, we’ve mostly used Reflector as the way of doing AirPlay mirroring from our iPads into a large projected image. This has worked well when using old-fashioned VGA projectors and a 4:3 image. However, the connection can sometimes be unreliable, which is probably down to network/wifi issues. But, due to the advantages I’ve previously outlined, Reflector seemed a better choice than the main alternative: Apple TV.  Apple TV is a little black box that works (amongst other things) as an AirPlay receiver for content from your Mac or iOS device.

However, after some discussion with some fellow ADEs, I’ve come to appreciate the advantages that Apple TV has over Reflector.

  • It’s Apple’s AirPlay mirroring solution, rather than a third-party reverse-engineered hack, so that means it’s more likely work more reliably.
  • If connecting to an HD device via HDMI, setup is super simple.
  • You can have one-time device authentication, where a new AirPlay connection requires entering the on-screen passcode. This stops accidental AirPlay connections (thank you Early Years!) without having to remember or share a password.
  • Peer-to-peer. Which is amazing! With a lightning connector iPad, it uses Bluetooth to set up a direct wifi connection to the Apple TV, thus bypassing the local network and so reducing the network load.
  • Modern macs can AirPlay to Apple TV. I’m interested what impact this will have on its use in the classroom, is it makes it the same class citizen as the iPad.

Here are some things I’ve discovered to make setup easier:

  1. Turn on Conference Mode so that it shows instructions for AirPlay mirroring, rather than the normal grid of video apps.
  2. Turn on device authentication to make peer-to-peer AirPlay connection work.
  3. Have a wired Ethernet connection to the Apple TV to reduce load on your wifi.
  4. Do a restart on the Apple TV after setup to make the changes take effect.
  5. Make sure it’s an HDMI HD display your connecting to, either a projector or a TV. It just doesn’t work very nicely with old school VGA projectors, even widescreen ones.

Stop, collaborate and listen #ade2015

ADE Institute 2015

So, I’ve just finished the EMEIA (Europe, Middle East, Indian & Africa) Institute as a newly (qualified? graduated? inducted?) Apple Distinguished Educator.  It’s been an intense four days of professional development, hearing stories from educators from across the (third of the) world, sharing a bit of my story, meeting lots of new people and making some friends.

Here’s a few things that I’m going to take away from the time:

Step away from the computer

I was quite surprised by how many people here are actually ‘just’ educators who use Apple stuff in their classrooms, rather than a techy/geek person (like me).  But what people are doing in their classrooms with technology is amazing!  Like making multi-touch books to teach medicine, or creating video walls with iPads or even just doing a spot of green screen.  I need to make sure I don’t get bogged down with getting the technology to ‘just’ work that I don’t end up with no time to work with teachers on transforming the learning that goes on in the classroom.

Ice ice baby

On the last day of the event, I was asked to share on the main stage a little bit of my experience of the week.  And for some reason, the lyrics of Vanilla Ice sprang to mind: “Stop! Collaborate and listen…”  As they do.

But seriously, it’s been a great time to actually stop (in amidst the hectic schedule) and reflect on what I do in the classroom, work with other brilliant teachers from all over the world and listen to the cool stuff that they’re doing.  Of which there is much.  It makes me feel very ordinary coming to a place like this!

Paper by FiftyThree

I’ve also discovered and now avidly taken up ‘sketch noting’, which is where you draw notes on your iPad rather than just typing.  I’ve been using the app ‘Paper‘, which now seems to be free to use, including all of the clever pens and tools.  It’s a lot of fun and lets me be creative whilst listening.  I’ve put some of these on twitter, so do take a look.

The 1:1 Question

Over the last year I’ve kind of resigned myself to the fact that we’re never going to be a 1:1 iPad school. But having met people from lots of state schools, including primaries, where they have gone 1:1, that little dream has returned.  I need to come up with a serious plan (which basically will involve working out where savings can be made to pay for it…printing/photocopying/SIMS I’m looking at you!)

The State of Mac Management

In the glory bygone days, managing Macs was easy: just setup a OSX Server, get Workgroup Manager working and then configure users preferences to your heart’s delight. There were ways to easily tweak settings using a GUI, or you could import whatever .plist file you wanted to and have a custom preference.

Now, it wasn’t all a bed of roses: the Mac had to be bound to the OSX Server for these managed preferences to work, meaning things got rather ugly if the server got taken down for any reason. Plus, you had to find other solutions for imaging Macs, deploying and updating software and remote access. But there were tools for this (Deploy Studio, Munki, Apple Remote Desktop), so we were happy.

Then along came Lion. As part of taking everything Apple had learnt from iOS ‘back to the Mac‘, Configuration Profiles were introduced. These were just the same as the profiles used to manage iPhones and iPads, offering ways to lock down certain things and setup accounts like email etc. The other cool thing was that these lightweight profiles could be pushed out to a Mac from an MDM server, removing the need to have the Mac permanently bound to a server. Instead, the Mac would keep hold of its profiles until the server gave it some new ones. Macs and iPads could all be managed from one place: one MDM to rule them all!

Workgroup Manager continued to be updated by Apple, but with very little attention given to it. The last version released was for 10.9 server: it still works in 10.10, but has officially been retired and any future support for it is quite unlikely.

As someone who likes to live at the bleeding edge of technological change, did I adopt it straight away? Not for want of trying! Apple offered their own ‘free’ version of an MDM as part of their Server app, called Profile Manager. We couldn’t even get it to work in 10.7, finally got it working with some iPads in 10.8 and then gave up on it in 10.9 (after suffering email profiles being pulled off every teacher iPad due to some weird Active Directory issue).

The issue with it boiled down to how Configuration Profiles just aren’t the same as Managed Preferences. In the ‘walled garden’ of iOS, we just accepted that certain things just weren’t manageable (like position of apps on the home screen or the initial setup of apps etc). Whereas Managed Preferences had given the Mac administrator the taste of absolute control – you shall have the settings I give you! Plus, they also had the fine-grained option of setting preferences to ‘once’, ‘often’ (ie every time you logged in) or ‘always’… with profiles, everything was just ‘forced’.

So, the questions are: what actually needs to be managed? what are the ways of doing it?

Things that need to be managed:

  • First run settings on stuff like Office
  • Mounting shared drives
  • Tweaking the UI as required, eg right click on Apple Mouse, sidebar defaults etc
  • Licence keys for apps
  • Setting keyboard, location etc
  • Managing the dock
  • Installing new software and patching existing software
  • Imaging new Macs
  • Running Apple Software Update

So what are the tools?

  • Using a Configuration Profile, either for the settings Apple gives you, or importing a custom plist – only works if you don’t mind it being ‘always’. Tim Sutton has a command line tool for converting a .plist file into a profile. An MDM server can push out profiles over the air and Munki can now install profiles too.
  • Tweaking the preferences in the default user template. Composer as part of Casper Suite has a handy feature for doing this as well as filling existing users’ preferences as well.
  • Running various scripts on startup/login/logout. Our Apple reseller has a way of running various scripts like this, and Casper can manage his too. You can also make payload-free packages which just run a script when installed and can be distributed with Munki.

So how do you choose the right tool? The factors are:

  • Cost: MDM servers aren’t cheap necessarily, nor is spending money on getting an Apple reseller to set things up for you.
  • Experience: are you savvy with scripting and dealing with the command line? If not, a solution with a GUI might be better.
  • Continuity: I work in a primary school where high turn-over of staff is quite common. Does the solution need to keep working even if you go?
  • Time: do you have time to learn and understand the intricacies, or do things need to work ‘out of the box’? I am in the fortunate position of being able to give time to figure some things out, but most primary schools aren’t.

At my school, we’ve gone for Casper Suite as a way to have a GUI for managing Macs that doesn’t rely on me being a complete Mac system admin with lots of experience in scripting etc., whilst also moving away from Managed Preferences and leveraging Configuration Profiles instead. Let’s hope it works!

Casper Suite

We’ve just had Casper Suite installed at my school. Part of the installation process is a three-day ‘Jump Start‘ where a highly experienced trainer (in our case, two, as we had someone shadowing) guides you through installing the software and the processes involved in setting up and running it.

So why Casper suite? Over the years, we’ve ended up using a range of different systems and technologies to manage the Macs and iPads in school. The Macs have been managed with an OSX Server running Workgroup Manager, plus a few scripts written by our Apple Reseller and the use of Munki for managing software installs and updates. With iOS, we’ve used Meraki, making use of the VPP programme and managed distribution, as well as Apple Configurator for class sets of iPads.

This has worked pretty well, but I knew we needed to move away from Workgroup Manager. Since 10.7 Lion, Apple has pushed the use of Configuration Profiles instead of Managed Preferences. Technology-wise, it isn’t a straight swap, as there are things you can do with MCX that you can’t do with profiles, and vice versa. But with 10.10, Workgroup Manager no longer even exists (even though the 10.9 version still works!), so I knew we had to do something. Casper suite was well spoken of, properly supported OSX as well as iOS, and seemed to have some cool features.

The main drawback of Casper Suite is the cost: as an educational customer, you only pay for support per device, which works out pretty cheap. But you have to pay for the three days of ‘Jump Start’ before you begin, which is not cheap! However, I calculated that it works out about the cost of a case per device, which isn’t so bad. An iPad without a case is pretty hobbled, and I’m sure Casper will add a depth and richness to our deployment.

The Jump Start went pretty well, and we managed to get everything working by the end of the three days. I did finish the three days feeling overwhelmed with everything there is to do (sorting out all the configuration of the Macs then imaging them all, plus redoing all the iPads), but I think it will come together over the next half term.

Here are some of the highlights so far:

  • Casper Focus: allows a teacher lock all the iPads in a class to a particular app or webpage
  • Self service: dishing up apps, books and in fact most things to users
  • Deployment Enrollment Programme (DEP): iPads get automatically enrolled to Casper and tied to a certain user out of the box
  • Composer: a powerful way to package up Mac apps, including the ability to fill the user template and existing users’ preferences
  • JSS: the fact it runs as a web service, meaning that Macs don’t have to be bound to an OSX server any more
  • JAMF Nation: a community of helpful geeks who are there to help find solutions to problem

I’m not sure it’s the right solution for small primary schools, or places without an onsite Mac geek, but I think it’s going to work really well for us.

Apple Distinguished Educator

So, I’ve been accepted to become an Apple Distinguished Educator, class of 2015!

I had to tell the story of how I used Apple technology to transform the learning environment in my school, both in words and in a video. It was quite tricky to distill it down into a decent and clear narrative, but I guess I must have done ok!

Part of the induction process is attending the ADE Institute in the summer. This should be a fascinating week, learning more from educators from across Europe, Africa, Indian and the Middle East about how to use technology to transform education.

Thought on Chromebooks

There has been much talk about the place about how Chromebooks are overtaking iPads in the classroom. Maybe they are. And maybe they do have advantages, such as:

  • cheaper hardware
  • easy to set up and manage
  • multiple users per device
  • works nicely with Google Apps
  • data all in the cloud
  • etc…

However, everything is done through a web browser.  Which to me sounds like a very depressing way to go.

The Wonderful WWW has been transformative (thanks Tim), but displaying everything using a web browser is really rather limiting in the end.  Hypertext Markup Language is not the same as a proper operating system with proper apps.  Which is what you get with iPad.  Which means you can do cool stuff like:

  • make videos
  • do green screen
  • draw with your finger
  • have a proper mail client
  • have 3D animations
  • etc….

Now, obviously all the best iPad apps make use of the Internet to make the experience better.  But making us of http:// isn’t the same as using .html.

Let me use our VLE (run using moodle) as an example.  It runs off a web server, which means it can be accessed anywhere in the world on any platform that has a web browser.  But the downside is that it’s a horrible and clunky experience.  Adding a calendar entry on an iPad versus on a Moodle page is like comparing something easy to something unpleasant.  We use a SIMS plugin so we can enter assessment data and take registers, but the user experience is horrible.  Admittedly, using SIMS on a PC isn’t all that wonderful, but at least it’s a native experience.  A web page isn’t native for anyone.

Which is why I’m thinking that we might need to look at the SIMS Teacher app.  It doesn’t do anything more than what Moodle can, but it potentially does it in a more pleasant way…

Bye-bye SMARTboards

Having unplugged and uninstalled ourselves from the SMART ecosystem, embracing instead mirrored iPads and Explain Everything, one problem still remained: having a surface to write on! Using a stylus (or finger) on an iPad is ok as far as it goes, but for properly modelling good handwriting to a class you need to be able to write on a large surface.

In many ways, the ideal scenario is . This gives you a crisp digital surface and a really good physical writing surface. However, at my school there just isn’t the space for both in our classrooms. In a new building, we experimented with putting dry-wipe paint on one of the walls and then pointing an HD projector at it too. Writing anywhere on a wall is cool, but having the ability to include digital content is handy too.

So, in order to roll this out across the school, we decided to install special where the SMARTboard surface was before. These boards are designed to be projected onto so you don’t get as much glare as a normal shiny whiteboard, but you can still write on them. We kept using the existing 4:3 VGA projectors, but the boards could also fit a 16:9 HD projected image for when we upgrade in the future.

The installation went down very well with teachers. One of the consequences has been seeing less use of the projector for when it’s not really necessary. Having a decent writing surface to teach with is actually really rather lovely.

Yosemite won’t boot

Since upgrading our Macs to OS X 10.10 Yosemite, we’ve had an issue where Macs won’t boot up properly. They start up and show the grey loading bar, but it gets to 50% and then gets stuck there. Some hacks and tricks would sometimes help (like resetting the PRAM and repairing the disk and permissions), but not always. I hoped that 10.10.2 would fix things, but alas it has not.

It turns out that the problem was to do to with having the Mac bound to an Active Directory. Thankfully, I found a solution on the JAMF support pages from the contributor Chris Hotte. He suggests editing the rc.server file as follows:

  1. Boot into single user mode
  2. Type ‘mount -uw /’
  3. Type ‘/usr/bin/nano /etc/rc.server’ to edit the file
  4. Type in the following code.

    #!/bin/sh
    /bin/echo BootCacheKludge Beta 1.0 – Chris Hotte 2015 – No rights/blame reserved.
    /usr/sbin/BootCacheControl jettison

Hope that helps someone! You can find the original post here.
You can read the post here. Hope that helps someone!